

How to Install GCam on Any Android Device: A Complete Beginner Guide (2025)
Installing GCam is one of the simplest ways to improve the photo quality on almost any Android device. However, many beginners are unsure which version to choose, where to get it, and how to properly install it without encountering errors.
This guide provides a thorough, step-by-step explanation of the installation process — without hosting or distributing APK files — so you can safely set up GCam while avoiding common mistakes.
What You Need Before Installing GCam
Before beginning the installation, make sure your device meets the basic requirements:
Camera2 API Support
GCam requires Camera2 API to access advanced controls such as:
- Manual exposure
- Frame stacking
- RAW capture
- HDR+ processing
Most modern Android phones support Camera2 API, but some older or budget models may require checking device compatibility.
Enough Storage Space
GCam ports vary in size. Ensure you have at least:
- 200 MB free for the app
- Additional space for photos, processing cache, and configuration files
A Trusted Developer Source
Never install GCam from random websites.
The GCam community typically relies on well-known developer repositories that specialize in maintaining safe, updated versions.
GCamLab does not store or distribute APK files but provides educational information to help users understand safe installation practices.
How to Install GCam: Step-by-Step
The steps below are designed for beginners and apply to almost all Android devices, regardless of brand or model.
Step 1: Identify Your Device Model
Installing the right GCam version starts with knowing:
- Device name
- Processor type
- Camera sensor type
- Android version
Different ports are optimized for different hardware. For example:
- Snapdragon devices generally have excellent compatibility
- Samsung Exynos devices may require specific versions
- MediaTek devices need careful port selection
Understanding your device helps you pick a version that is likely to work without issues.
Step 2: Select a Compatible GCam Port
Not every GCam build will work on every device.
Most users follow this approach:
- Start with a port known to work well on similar devices
- Compare builds from developers such as Arnova, BSG, Shamim, Greatness, or LMC
- Look for community recommendations for your exact phone model
A well-matched port gives you:
- Stable lens switching
- Accurate color reproduction
- Better Night Mode performance
- Fewer app crashes
- Improved HDR+ quality
Choosing the right port is the most important step for a clean setup.
Step 3: Enable App Installation from Trusted Sources
Since GCam is not available on the Play Store, you must manually allow installation from verified external sources.
Open:
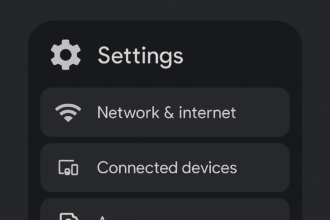
Settings → Apps → Special Access → Install Unknown Apps
Select your browser or file manager and toggle the permission to allow installation.
This setting is necessary for all APK-based installations on Android.
Step 4: Install the GCam Port
Once you have chosen a safe and recognized port:
- Open your file manager
- Locate the APK file
- Tap to install
- Wait for Android’s security scan
- Complete the installation
If the installation fails, possible reasons include:
- Incorrect port version
- Incompatible processor
- Corrupted file
- Insufficient storage
- Android security restrictions
Trying another version typically solves the issue.
Step 5: Configure GCam After Installation
GCam usually works immediately after installation, but some devices require additional configuration to achieve the best results.
Typical settings users adjust include:
- HDR+ quality
- Night Sight exposure control
- Noise reduction strength
- White balance modes
- Lens switching options
Advanced users also load XML configuration files for optimized sensor calibration.
Step 6: Test All Camera Modes
Before using GCam as your main camera, test all modes to ensure compatibility:
- HDR+ Enhanced
- Night Mode
- Portrait Mode
- Motion Photo
- Astrophotography (if available)
- Ultrawide and telephoto lenses
- Video modes
If any mode does not work correctly, switching to another port version usually resolves the issue.
Tips for Getting the Best Results from GCam
To achieve optimal quality, consider the following:
Use Correct Lens Mapping
Some phones have unique or reversed lens identifiers.
GCam settings allow you to assign the correct lens to each button.
Avoid Over-Sharpened Images
Increasing sharpening may cause unnatural textures.
Most XML files already set balanced values.
Keep HDR+ Enhanced On
This mode provides the best dynamic range and overall clarity.
Try Multiple Versions
It is normal to test more than one GCam build.
Even phones from the same series may behave differently depending on sensor variations.
Restart the App After Changes
GCam applies some settings only after a restart.
Troubleshooting Common Installation Problems
If you experience issues during or after installation, here are common fixes:
App Not Opening
Try another port or clear app data.
Lens Switching Does Not Work
Choose a port known for better auxiliary camera support.
Night Mode Crashes
Lower the HDR+ frames or switch to a different version.
Colors Look Unnatural
Adjust white balance or apply an XML file designed for your phone model.
Low Frame Rates in Viewfinder
Disable unnecessary image processing toggles.
Every phone behaves differently, and minor testing is often required.
Conclusion
Installing GCam on an Android device is one of the easiest ways to significantly improve image quality.
With the right port, correct setup, and basic testing, users gain access to:
- Better dynamic range
- Superior night photography
- Clearer details
- More accurate colors
- More stable portrait effects
This guide provides a safe, beginner-friendly approach without distributing any APK files — making it suitable for all users while remaining compliant with platform policies.
GCamLab will continue publishing tutorials that help users understand GCam installation, optimization, configurations, and troubleshooting for all supported devices.