
How to Install Google Camera (GCam) on Any Android Phone
Introduction
Google Camera, commonly known as GCam, is one of the most powerful camera applications available for Android devices. Thanks to advanced computational photography features like HDR+, Night Sight, and Astrophotography, GCam often produces better photos than stock camera apps.
In this guide, you’ll learn how to safely install GCam on any Android phone, which version to choose, and how to avoid common installation problems.
What Is Google Camera (GCam)?
Google Camera is the official camera app developed by Google for Pixel devices. Over time, developers have created modded GCam APKs that allow non-Pixel phones to use many of the same advanced features.
These modified versions are commonly referred to as GCam ports.
Is GCam Compatible With All Android Phones?
Not every Android phone supports GCam in the same way.
Key compatibility requirements:
- Android 8.0 or higher (recommended)
- Camera2 API enabled
- Snapdragon processors generally offer better compatibility
- MediaTek devices may have limited support
You can still try GCam on unsupported devices, but stability may vary.
How to Check Camera2 API Support
Before installing GCam, it’s important to check if your device supports Camera2 API.
Steps:
- Open Google Play Store
- Install a Camera2 API checker app
- Verify that at least Level 3 or Full support is enabled
If Camera2 API is disabled, GCam may not work properly.
How to Download GCam Safely
To avoid security risks, always download GCam from trusted sources.
Important safety tips:
- Avoid modified APKs from unknown websites
- Never grant unnecessary permissions
- Check version compatibility before installing
Reputable GCam ports are usually created by well-known developers such as BSG, Arnova, or MWP.
Step-by-Step Guide: Installing GCam APK
Step 1: Enable Unknown Sources
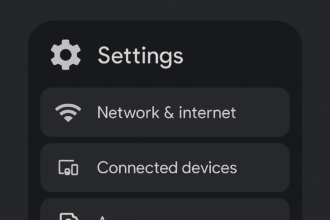
- Go to Settings
- Open Security & Privacy
- Enable Install Unknown Apps
- Allow your browser or file manager
Step 2: Download the Correct GCam Version
Choose a GCam version based on:
- Android version
- Device brand
- Processor type
Downloading the wrong version may cause crashes or black screen issues.
Step 3: Install the APK File
- Open the downloaded APK
- Tap Install
- Wait for the installation to complete
No rooting is required.
First Launch Setup Tips
After installation:
- Allow camera and storage permissions
- Open the app once before applying any settings
- Test basic camera functionality
If the app crashes on first launch, try a different GCam version.
Common Installation Problems and Fixes
GCam App Keeps Crashing
Possible reasons:
- Incompatible APK version
- Unsupported Android version
- Missing Camera2 API support
Solution: Try an older or more stable GCam build.
Black Screen Issue
This usually occurs due to hardware incompatibility.
Solution: Disable HDR+ or switch to a different GCam port.
App Not Installing
Make sure:
- Unknown sources are enabled
- APK file is not corrupted
- Storage space is sufficient
Should You Use XML Config Files?
XML config files can significantly improve image quality and stability.
However:
- They are optional
- Incorrect configs can cause crashes
- Always use configs designed for your specific device
Is GCam Worth Using?
For many users, GCam offers:
- Better low-light photography
- Improved dynamic range
- Sharper images
If your device supports it properly, GCam is absolutely worth trying.
Final Thoughts
Installing GCam on Android is safe and simple when done correctly. By choosing the right version and following proper installation steps, you can unlock powerful camera features without rooting your phone.
For device-specific guides, settings tutorials, and troubleshooting tips, explore other tutorials on GCamLab.